
How to Add a New Asset Manually
Strev makes it easy to track and manage all your physical and digital assets. You can manually add assets anytime using the Quick Add menu or from the Asset Management module.
Method 1: Using the Quick Add Button
- Log in to your Strev account.
- Click the Quick Add (➕) icon in the top-right corner of your dashboard.

- Select Add Asset from the dropdown menu.
- Fill in the asset details, such as:
- Asset Name
- Category
- Supplier
- Serial Number / Tag
- Purchase Date / Warranty Expiry
- Status (e.g., Active, In Maintenance, Archived)
- Location or Assigned To (if applicable)
- Click Save to create the asset.
Method 2: From the Asset Management Page
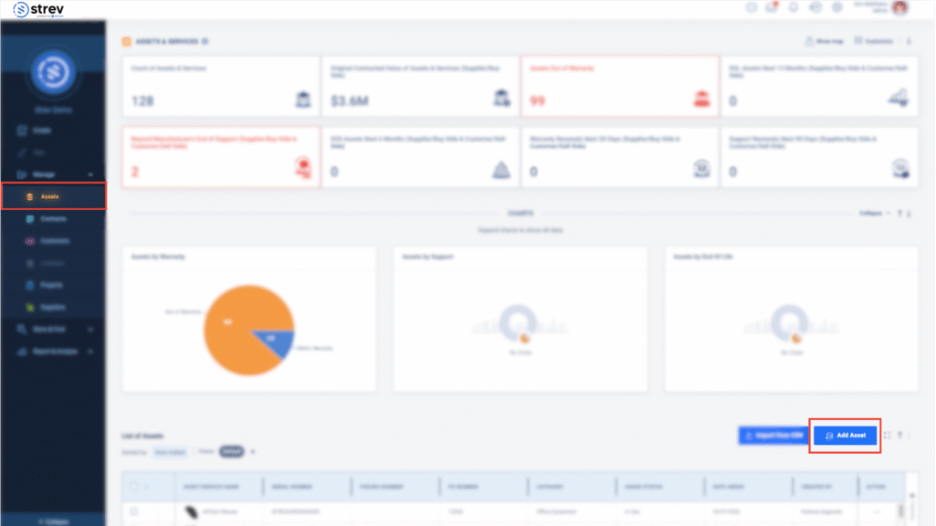
- In the left navigation, go to Manage > Assets & Services.
- Click the Add Asset button (usually located in the top-right).
- Complete the required fields just like in Quick Add.
- Optionally, attach documents (e.g., purchase receipts or service reports).
- Click Save.
Note: Only users with Admin and Regular roles can add or edit assets. If you can’t see the Add Asset button, contact your workspace admin.
Pro Tip
After adding your asset, you can:
- Link it to contracts, suppliers, or customers
- Set up warranty and support expiration dates
- Track asset lifecycle events like replacements or decommissioning
Need to bulk import multiple assets? Check out our upcoming article on Importing Assets via Spreadsheet Upload, or reach out to support@strev.ai for help.


