
How to Send a Document for E-Signature
Strev allows you to send documents for e-signature in multiple ways depending on where your file is located. Follow the options below.
Option 1: From Documents (Create Module)
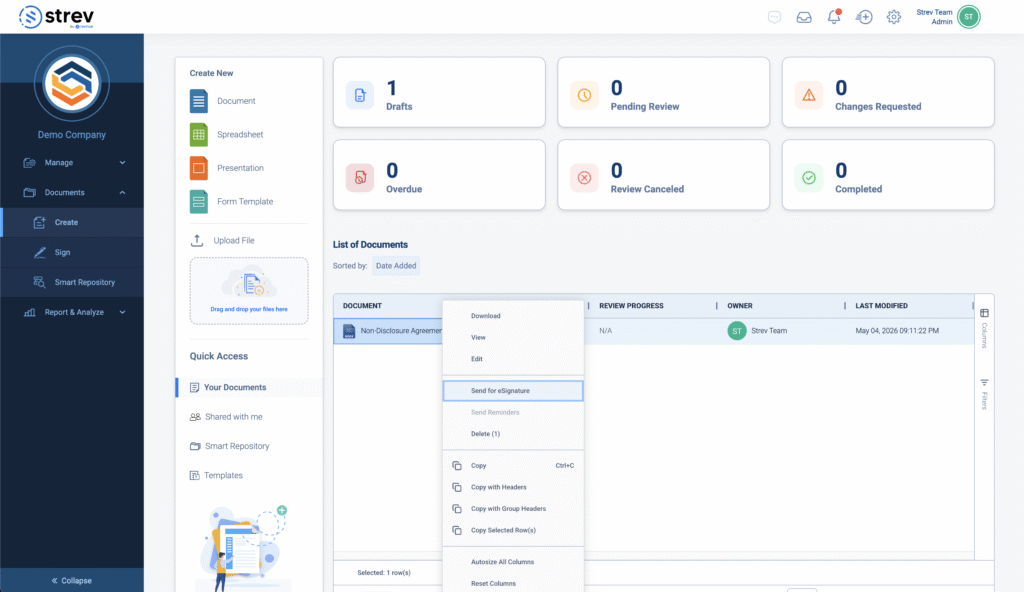
- Go to Documents → Create.
- Locate your document in the list.
- Right-Click on the document that you intend to send for esignature.
- Select Send for eSignature.
This is the fastest way if your document is already created inside Strev.
Option 2: From Within the Document Editor
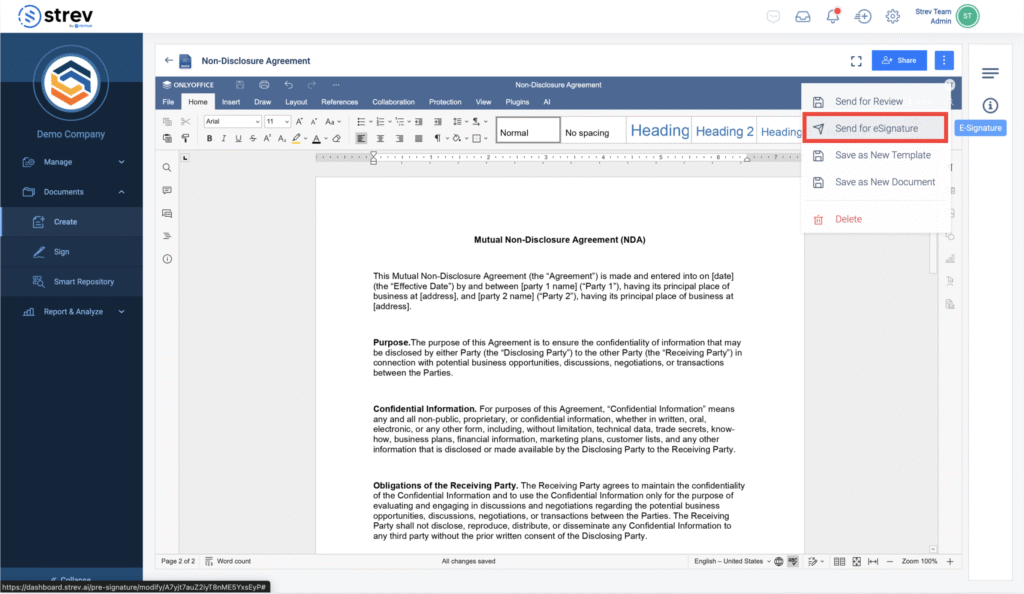
- Open your document.
- Click the Actions (⋮) menu on the top right.
- Select Send for eSignature.
Use this when you are already editing or reviewing the document.
Option 3: From Smart Repository
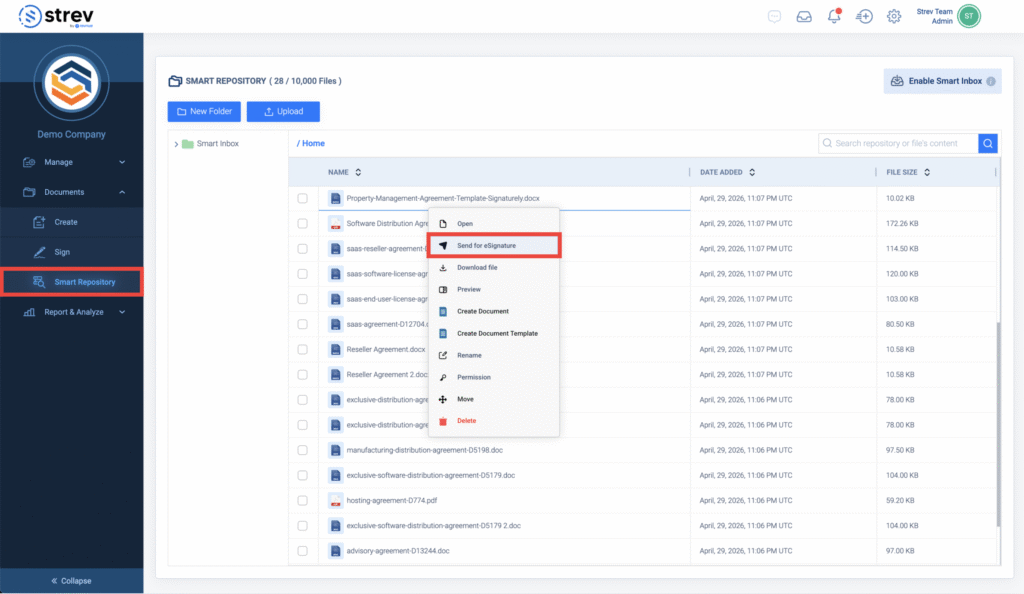
- Go to Documents → Smart Repository.
- Right-click on the file you want to send.
- Select Send for eSignature.
This works for files stored in your repository without needing to open them first.
Option 4: From the E-Signature Dashboard
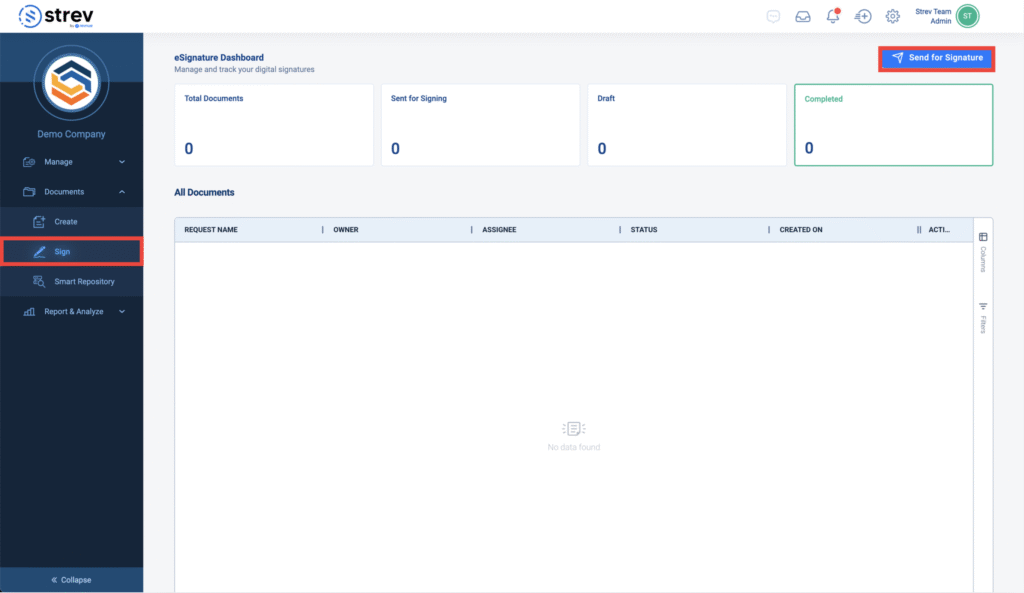
- Go to Sign from the left menu.
- Click Send for Signature (top right).
- Upload or select a document.
This is useful when starting a new signature request directly.
After Clicking “Send for eSignature”
Regardless of how you start, the process is the same:
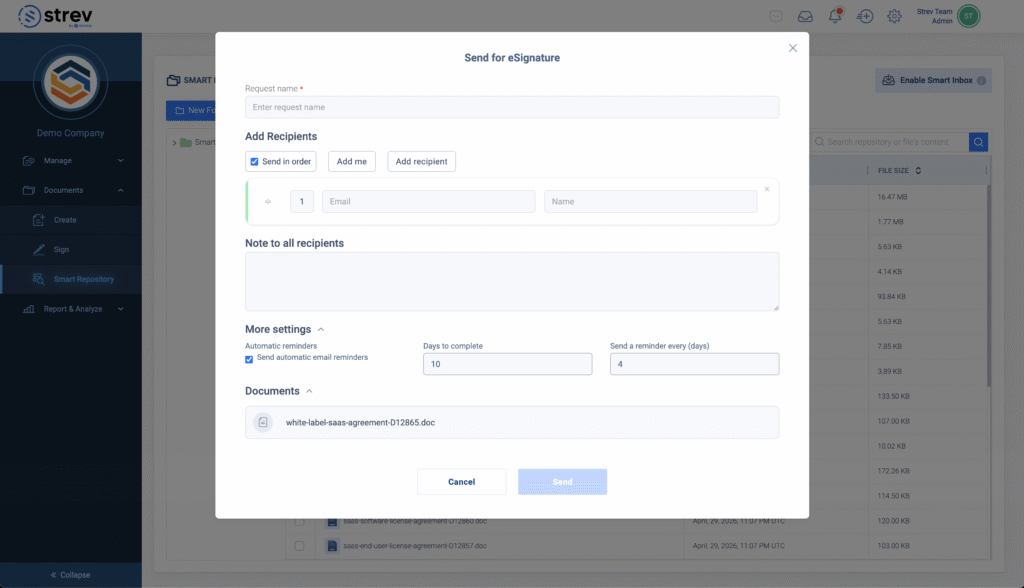
Step 1: Enter Request Name
- Add a Request name
- This helps you track the signature request in the dashboard
Step 2: Add Recipients
- Click Add recipient
- Enter:
- Name
Optional:
- Add me → include yourself as a signer
- Send in order (enabled by default)
- ON → signers receive the document one at a time (sequential)
- OFF → all signers receive it at the same time (parallel)
You can also reorder recipients using the drag handle on the left.
Step 3: Add a Message (Optional)
- Use Note to all recipients to include instructions or context
- This message will be included in the email notification
Step 4: Configure Settings (Optional)
Click More settings to expand:
- Send automatic email reminders → toggle ON/OFF
- Days to complete → deadline for signing
- Send a reminder every (days) → frequency of reminder emails
Step 5: Review Document
- The selected document will appear under Documents
- Confirm that the correct file is attached
Step 6: Send for Signature
- Click Send
- The request will be created and emails will be sent to recipients
After Sending
- Track progress in Sign (E-Signature Dashboard)
- Status updates include:
- Draft
- Sent for Signing
- Completed
Notes
- Recipients do not need a Strev account to sign
- Signing order depends on the Send in order setting
- Automatic reminders help reduce delays
- A completed copy is saved once all signatures are collected